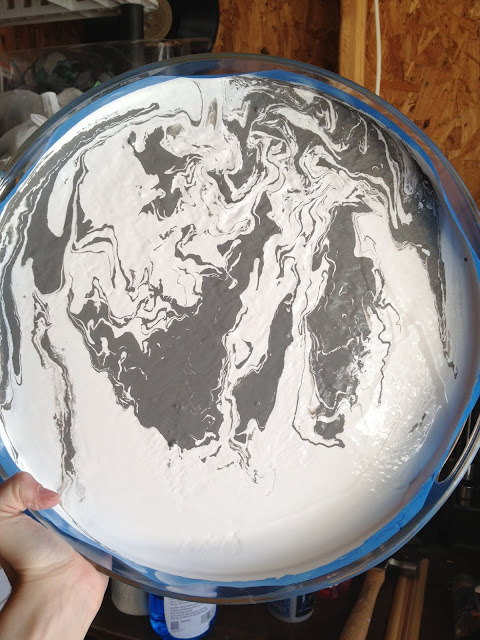
This tray was sort of an experiment. It's kind of fun sometimes to work on something and just see what happens because you have nothing to lose. Sometimes those are the best projects. I am automatically drawn to anything acrylic/lucite looking so I was instantly drawn to this tray at the thrift store. It was only a few dollars and extra trays are always good to have around. I didn't love the yellow tone the base had going on and it was a little scratched but that didn't stop me.
At first I thought about adding scrapbook paper or wrapping paper to cover the bottom, but then I remembered the ornaments I did a while back and thought I would try the same technique on this tray for a marbled look.
So, I taped off the edges since I wanted to keep some of that lucite look going.
Then, I primed the bottom of the tray, not sure that step is necessary but just wanted to make sure the paint would adhere. Then, this is the fun part, just pour some paint into the tray. I just used leftover white latex paint I had in the garage.
Add a second color of paint. Just put several dollops of paint on top of your first color. You can use any color combination you want, just keep in mind what color the two colors make when blended together.
Time to start swirling your paint together. Just keep turning the tray until you get the whole thing covered with paint and you are happy with the pattern. The more you swirl the more mixed and marbled your tray will look. You want to have a thin layer of paint covering the whole surface. If the paint seems to stop moving and you need to add more paint you can. I had to do that a few times. Don't worry if there seems to be too much paint in there, we will get to that in a minute. As tempting as it may be to use a brush to get things moving a little faster try to refrain. It will mess up the marbled look.
Once the surface is completely covered and swirled to your liking you can get rid of some of the excess paint. I just cut a small section out of the tape where the tray handle was so I could pour off some of the excess paint.
Once most of the extra paint is poured off, lay your tray flat to dry. I waited until the paint was mostly dry to remove the tape. I ran an exacto knife along the edge before I removed the tape so the tape wouldn't pull up the paint.
Since the layers of paint are a little thicker than a normal layer of brushed on paint it will take a little longer to dry. I just set mine out in the sun for a few days to air out and cure. If you wanted to, you could add a clear top coat for extra protection and shine.
If you're looking for a tray to try this out on, check out this one from CB2. This would also be great to try with a shadowbox frame like I did for my DIY lucite tray.
You can still see a hint of that yellow in the plastic, but I don't mind it.
If you're looking for a tray to try this out on, check out this one from CB2. This would also be great to try with a shadowbox frame like I did for my DIY lucite tray.


7 comments:
Creative idea and great tutorial. Could be a really fun children's project too. Hugs, Marty
Fabulous as usual. I love experiments that turn into something great!
So clever! You can never have enough trays in my book, and it's a great look instead of scrapbook paper.
I love how you take everyday finds and make them into such great pieces!
That is so cool! I love how the thick paint left such a nice texture when it dried. Great idea!
Love this. Such a stylish vignette!
Xo Nancy
Powellbrower.com
I have the perfect plastic tray for this project. I've been looking for a way to change it from plain black and now I've found it! Pinning so I don't forget. :)
Post a Comment
Thank you for your sweet comments, they make my day!