Monday

DIY chevron light

You all may remember the birdcage light I made for my daughter's nursery.  I still really love that light, but just wanted to change things up in her room.  I'm basically just swapping the yellow for pink and changing a few things up in there.  Since most of the birds on the branches were yellow, they had to go.  I still saved the branches in case I want to use the birdcage light for another room in the future.  

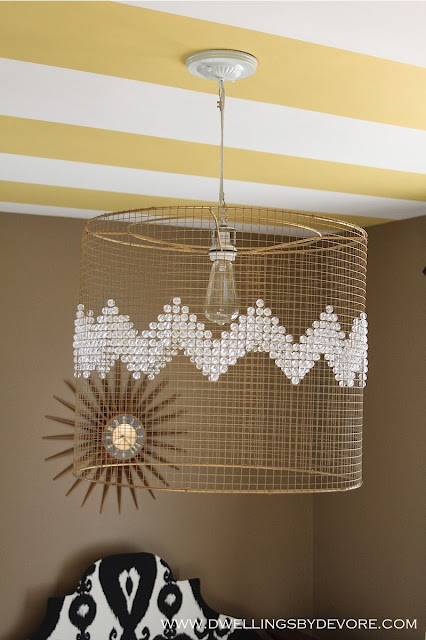
I removed the sticks so I was left with the cage type shade.  If you want to know how I made the shade, check out the original bird cage light post.  Then, I grabbed some fishing line and some faceted beads from Hobby Lobby.  They are the perfect size for this,  


Then, I started stringing them in a chevron pattern.  I was originally planning to bead the whole thing, but aint nobody got time for that.  It actually took me much longer to bead than I thought, so I'm glad I went with a less ambitious pattern.  You could do pretty much any pattern you wanted using any color beads.  It would make a fun lamp shade too.  I thought about doing a monogram or stars.  Like I said, pretty much anything would work.


and now I just have to repaint those stripes.  There's a reason I've been putting that off.  I've had the paint and tape forever, but painting ceiling stripes is probably one of my least favorite things to do.  At least the lines are already in place.


It's hard to capture it in a picture, but when the light is on or the sun hits it there's a pretty sparkle.


I'm hoping to get the ceiling taped today, that's half the battle.  Wish me luck!


Friday

Play Kitchen Roundup

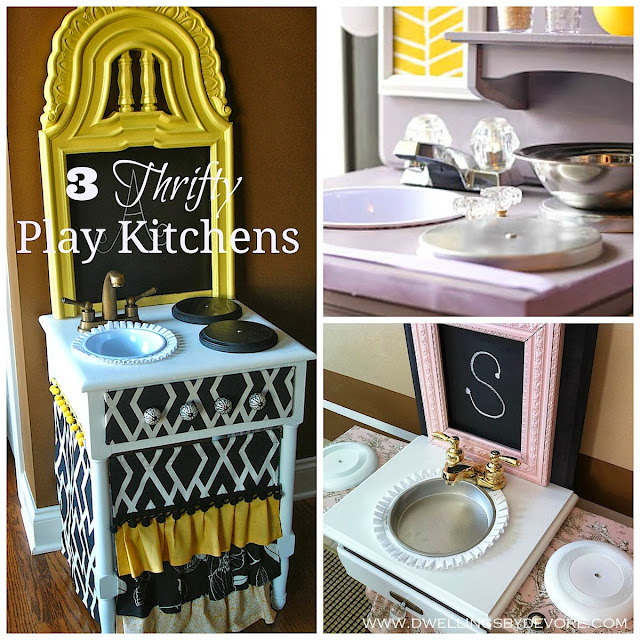
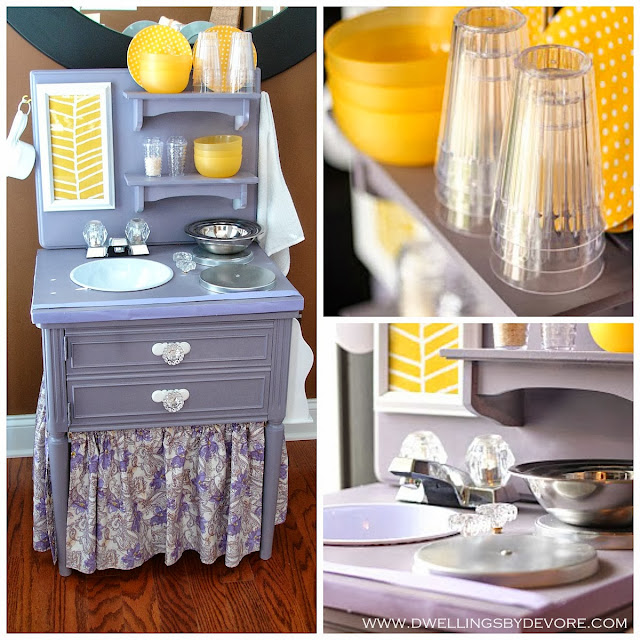
We just got back from one last summer hoorah at the beach.  Since we are settling back in and recovering from vacation mode, I thought I'd share a round up of a few play kitchens I've done over the past few years.  My daughter is getting to the age where she is interested in "helping" in the kitchen so I see me making another one of these for her in the near future.


If you missed these the first time around, I'd love for you to check them out.  I made this kitchen for a sweet friend of ours.  She is a true southern belle so I thought the toile suited her well.  Check out all the details here.


This was the very first play kitchen I made.  Check out the details here.


This was such a fun color scheme to work with.  I made it for a sweet family friend of ours.  Check out the full post here.


For my daughter's play kitchen, I'm feeling really inspired by this one I found on Pinterest.  The IKEA kitchens are quite cute too and could be so easily hacked!

Wednesday

Gold Glittered Frame

You may have noticed that I'm racking up on posts about my daughter's room.  That's because I'm doing a little mini makeover in there.  We are getting rid of the yellow and adding pink because I she loves pink.  It's girly and fun and I've just been itching to change things up in there.  Because most of the elements in her room were neutral to begin with, I'm not having to change much.  For instance, this little DIY project cost me next to nothing.  My mom gave me the frame.  It was red and black so I updated it to coordinate.  I painted the mat flower girl by valspar.  Then, I thought the frame needed something fun.  So, I pulled together my new favorite combination, gold and glitter.


I added my Kate Spade print that I scored for a few dollars.  The pink mat, gold, and glitter bring life to an otherwise boring frame.


If you are looking for a similar gold foil print, there are lots to choose from on Etsy.  I particularly like these.

Monday

tips for hanging the TV above the fireplace

A lot of people are against the idea of hanging the TV above the fireplace, but sometimes it just makes the most sense to put it there.  I'll admit, I'd love to hang our TV above a pretty dresser and surround it with a gallery wall, but that just wouldn't work in our living room.  It's long and narrow and in order to get the most seating and make it the most functional the TV has to go above the fireplace.  We've made it work by adding a shelving unit next to the fireplace to house all our electronics.  That has helped keep things streamlined and also helped take some of the focus off of the TV. 


Some of you are like me and this is the way things have to go down in your house too.  So here's a little inspiration to keep things looking pretty even when you're TV ends up being more of a focal point than you might like.

If you have the space, I think it always looks nice to have some built ins surrounding the fireplace.  It helps create visual interest and is great for storing some of your electronics too.  If you don't want to go custom, there are a lot of ways to customize store bought shelving units to make them look high end.  (check out how Kristin updated some IKEA Billy bookcases here)


Adding molding around your TV makes it looks like it's supposed to be there.


If you really want to hide the TV when you're not using it you can add some doors.  You can go a little more contemporary with this idea...


or a little more rustic...


If you or someone you know is handy with tools, building a frame is a great idea.  Check out the DIY here.


Paint the wood work/walls around the TV a darker tone.  This makes the TV blend into the wall a little more, creating less of a stark contrast.  The built ins here are a nice touch too.


And if you really want to get fancy, there are products on the market like this one from Seura that can actually turn your TV into a mirror or work of art when it's not in use.  I'm not sure how well these work or if it interferes with the way the TV looks, but it's a pretty neat concept.  I've seen Candice Olson use this idea in some of her designs too.


Do you have any unique ways that you've come up with to make your TV fit in more with your home decor?

Friday

Vintage Vanity Light

This isn't a super dramatic before and after, just a makeover with some good old gold spraypaint.  I came across this vintage vanity light at Goodwill the other day and couldn't pass it up.  It was a great price and such a fun piece.  It had a funky paint job from a previous DIY gone wrong, but other than that it looked great.

(pardon the messy garage)


It's actually a two sided mirror, one side magnifies (I try to avoid looking in that side) and the other is normal.  I taped it off and plugged the light sockets with tinfoil to prevent painting them.  At this point it started looking a little like something from outer space, but I pressed on!


I had a leftover strand of globe lights for our patio and the lightbulbs from that worked perfectly for this. 

Once it was all painted (rustoleum gold metallic), I added it to my daughter's room.  She's too young to understand it now, but I think it will be something fun and special to play with when she gets older.  For now it's a fun conversation piece for her room and an added source of light.  I like that it has sort of a marquee light feel to it.  The mirror has some imperfections, but that just adds to the vintage charm.  


I also added a new flamingo print to her room.  The jury is still out on it though.  It was only $0.99 on Amazon when I bought it so I'm not out a fortune if I change my mind.  I really love this one  from lay baby lay too. 


It even has a little drawer to store makeup and other things in.  I'm thinking of adding some fun paper to it down the road.


Wednesday

Black Botanicals

Black botanicals have such a classy and earthy feel to them.  I have always loved the way they look.  They can be quite pricey if you buy the real thing, but here are a few ways to achieve the look without spending a fortune.

I love how Pam included these botanicals in her client's kitchen.  Speaking of which, the kitchen makeover is beautiful!  You should definitely check it out if you missed it.  You can find the post here.  It is quite a transformation!


If you want an easy and inexpensive DIY route, you can find a pretty good selection of black botanicals at Vintage Printable.  They have tons of free printables to choose from, but their botanicals are my favorite.  The best part is they're free to print to your heart's content.  I found these images here. I think I might just have to do a DIY with these for my dining room, they are too pretty!


You could also snip a few pages from this book and frame them or just put this on your coffee table.  I love a good coffee table book.


IKEA has a pretty decent sized botanical poster for $19.99.  It's a pretty good bang for your buck.  

What do you think about botanical prints?  Do the black ones speak to you like they do to me?  

Monday

DIY lucite tray with handles

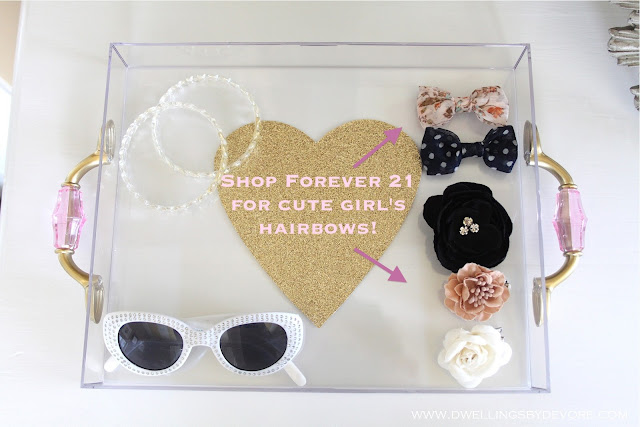
I've professed my love for trays before so it should come as no surprise that I'm back with another DIY tray today.  I did a DIY lucite tray for my bedroom a little while ago and wanted to do something similar for my daughter's room.  She has quite the collection of accessories these days: necklaces, bracelets, bows, etc.  It's amazing how young they start loving those things and knowing exactly how to use them!  I thought it would be fun to display a few of her accessories on a tray. It's also a great place to put things like those random little hair rubber bands that I always find in the floor.  I actually wish I had this tray when she was itty bitty.  It would have been a great place to put all the necessities (gas drops, gripe water, a thermometer) and have them within arm's reach.  

For the DIY, start with this frame.  You can find these at most craft stores and if you catch them on sale or use a coupon they end up being around $2 for this size (8 x 10)


For the handles, I dug through my hardware stash and came up with these.  I bought them at Goodwill forever ago, but they originally came from Target.  They were brushed nickel, but you know I can't stay away from gold so I gave them a quick spray.  I really didn't document this DIY, I'm so bad about taking step by step pictures.  I just get into the project and before you know it I'm done and have no pictures to show.  Thankfully this is really easy so I'm sure you guys will have no trouble figuring it out.  After I sprayed the handles gold, I used some hot glue to attach them to either side of the tray. I'm not planning to actually use the handles to lift the tray and carry it around so I wasn't worried about the glue being super strong.  If you were worried about that you could use a stronger glue, like E-6000. For the heart, I just cutout a heart from some glittered cardstock and attached it with Modge Podge.


All of these bows are from Forever 21.  They have adorable bows and they are so inexpensive.  


The tray is sitting on top of her newly painted dresser.  Pictures are coming soon!

Friday

Inexpensive Fall Candle Holder

I love fall and I'm definitely ready for the cooler temperatures that come along with it.  I'm still waiting to have my first pumpkin spice latte.  It just doesn't seem right to have it iced, but I might have to break down and do it.  I've actually already started doing a little fall decorating around my house just to get me in the fall spirit.  I'm hoping maybe the weather will follow my lead?  

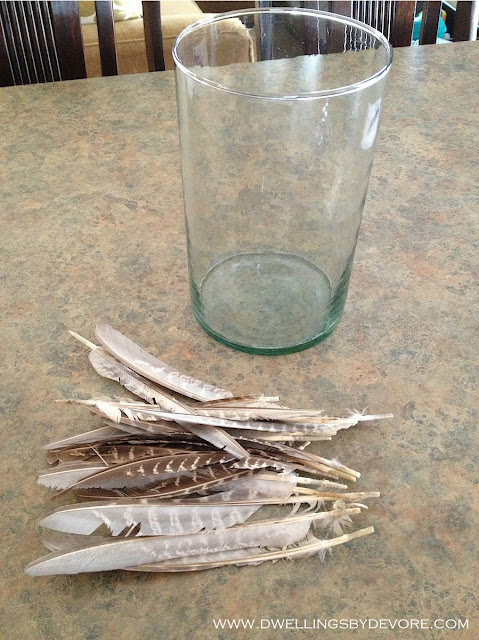
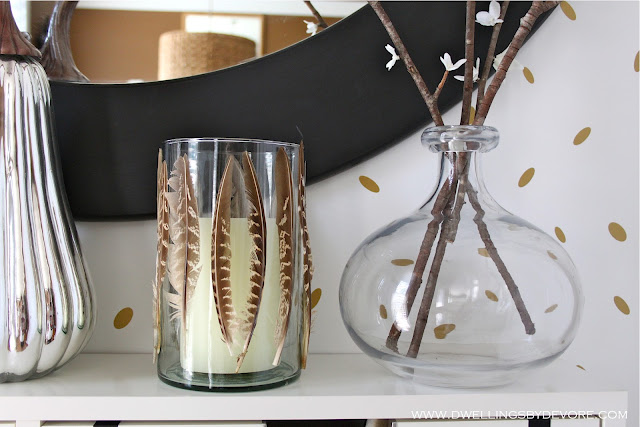
This is such an easy and inexpensive little fall candle holder.  Start with a vase, you probably have one lying around your house like I did, but if you don't you can pick something very similar up at the dollar store.  Then, I grabbed some feathers from the craft store (I found mine at AC Moore).  They were $1.99 for a pack of 18.  I only used one pack to do this project.  So the total cost for this project was $2.


I just used a small dab of hot glue to hold the feathers in place.  They don't really like to lay flat so you have to sort of play with them and coax them in the right direction.


It reminds me a little of the feather stuff that's at Target right now.  Have you started decorating for fall?

Monday

Zippered Pillows

Thanks to Mandi at Vintage Revivals and her awesome zippered pillow tutorial, I've been on a pillow making roll.  I always shied away from zippers in the past because I thought they were too hard.  Well, something clicked when I saw her tutorial.  She does a great job of explaining it and has lots of pictures.  I'm such a visual learner so that always helps.

Here's my stash so far.
  

Here are the sources for the fabric in case anyone is interested:

Black and white chevron: FabricHQ on Etsy
Charcoal trellis pattern: Napkins from Target
Coral/pink: remnant from local fabric store

If you're scared of zippers I highly recommend her tutorial!  It will make you want to sew pillow covers for every pillow in your house!  

Thursday

What can you buy for a dollar?

It's no secret that I love a good deal, so naturally I like the dollar store, most of the time.  We have a local dollar store that I like even better than the dollar tree.  They have some seriously good stuff.  I'm talking 6 packs of foam rollers for $1!  The same ones that sell for $10 a pack at Lowe's.  But today I'm going to share a few of my favorites from The Dollar Tree since most of you probably have one nearby.  

1.  Shelf Liners-Some of them are cute and some of them aren't so much, but I really like this black and white pattern.  They also have an assortment of contact paper that's great for things like lining the back of bookshelves.
2. Square White Plates-We bought these to use at the head table at our wedding and we are still using them!  They look way more expensive than $1 and are so versatile.  You can use them for pretty much any holiday or get together.  Dress them up or dress them down.
3. Foil Utility pans-I'm at the age where most of my friends are having babies.  These are so great to take food to them without them having to worry about cleanup and me not having to worry about getting my dishes back.  It's a win win!  I always make sure to have a few on hand.
4. Food storage jars-I love these jars.  They are so good for keeping things organized and looking pretty.
5. Shells-I haven't bought any of these yet, but I do love all things beachy.  Add these to an IKEA shadowbox and you've got yourself some art!
6. Party plates and supplies-I purchased practically all the paper products for my daughter's party here.  They have pretty much any solid color you would need and the price can't be beat.  You can always dress them up with fun, printed napkins too.
7. Mylar balloons-These are one of my favorite things to buy at the Dollar Tree.  Once again, the price can't be beat.  I always swing by there if I need one for a special occasion.  I usually stick with the solid color foil balloons.  They come in an assortment of pretty colors too, of course I always have to throw a gold one into the mix!
8.  Vases-I can't tell you how many times I've used these vases for decorating for special events.  They are also great to have around the house too.  If you need several of them you can always order them online and have them shipped to the store for free.  Great for weddings too!
9.  Gift wrap-They have some pretty cute gift wrap sometimes.  Great for wrapping gifts, of course, but also useful for lining drawers or creating photo backdrops, lining bookcases, etc.  I also like to grab a few gift bags while I'm there in case I get into a bind.

So those are the basic things I like to look for when I hit up The Dollar Tree.  Do you have any dollar store favorites?


Tuesday

DIY black striped vase

If you saw my entryway makeover you already know I've developed a new fondness for electrical tape.    It's inexpensive and totally reversible, great for those of us who like to change our minds.  I whipped up this little vase in no time.  

I started with a plain glass vase.  I got this one at Marshall's, but have had it for years.


I started at the top and worked my way down.  I tried to just eyeball it, but my lines got all wonky so I used small pieces of tape all the way around as spacers.  


I put a plum colored pillar candle in there for now, but I'm thinking a gold (even sparkly for the holidays?) candle might look great in there!


I brought out my silver pumpkin too, dreaming of fall and some cooler temperatures...